From Cloud to Pi: Deploy Apps with Kubernetes
Earlier this year, my Azure subscription ended, and I didn’t want to spend a couple of dollars to keep running my applications. I explored several alternatives, but there aren’t many free options, and in many cases, I had to modify my applications to make them platform-compatible. This was far from ideal for me.
I had a Raspberry Pi lying around, so I decided to turn it into my private server and host my apps on it. If you're in a similar situation and want to take more control of your infrastructure, here’s a guide on how you can do it using Kubernetes.
Setting Up Tunneling for Public Access
Running your apps/services on a Raspberry Pi using Docker or Kubernetes is fairly straightforward, but the real challenge comes when trying to make those services publicly accessible. Most Internet Service Providers (ISPs) don’t allow you to expose your IP publicly, and that’s where tunneling comes in.
Tunneling allows you to proxy your applications through a VPS (Virtual Private Server) running in the cloud. This way, users can access your services without worrying about IP restrictions.

While there are popular, production-grade tools for this like Cloudflare Tunnels or Ngrok, I prefer using Tailscale for privacy and security concerns. If you’re looking for alternatives, check out this awesome list of tunneling solutions that might spark some new ideas.
Deploying Your First Application
Since Raspberry Pi is a lightweight ARM64 device, I’m going with k3s, a lightweight yet production-grade implementation of Kubernetes. It’s perfect for resource-constrained environments like the Pi. Installing k3s is simple—just run the following command:
curl -sfL https://get.k3s.io | sh -
Now, let’s deploy an nginx application on port 80. You can create a pod and a service using the following commands:
kubectl run nginx --image nginx:stable
kubectl expose pod nginx --port 80
Alternatively, you can define a YAML file for the same setup:
---
apiVersion: v1
kind: Pod
metadata:
  labels:
    run: nginx
  name: nginx
  namespace: nginx
spec:
  containers:
    - image: nginx:stable
      name: nginx
      resources: {}
  dnsPolicy: ClusterFirst
  restartPolicy: Always
status: {}
---
apiVersion: v1
kind: Service
metadata:
  labels:
    run: nginx
  name: nginx
  namespace: nginx
spec:
  ports:
    - port: 80
      protocol: TCP
      targetPort: 80
  selector:
    run: nginx
status:
  loadBalancer: {}
Create the pod and service using:
kubectl create -f nginx.yaml
This will create a pod running the nginx image and a service that exposes port 80 on the container. You’ll see messages confirming their creation:
pod/nginx created
service/nginx created
To verify everything is up and running, use:
$ kubectl get all
NAME        READY   STATUS    RESTARTS   AGE
pod/nginx   1/1     Running   0          2m

NAME            TYPE        CLUSTER-IP   EXTERNAL-IP   PORT(S)   AGE
service/nginx   ClusterIP   10.43.7.41   <none>        80/TCP    2m
You should see the pod and service listed. Hitting the Cluster IP of the nginx service will return a success message from nginx, confirming that your deployment is successful.
Exposing Your Application
At this point, your application is accessible within the Kubernetes cluster, but it’s limited to the internal environment. If you want to make it accessible within your local network, you can configure an Ingress with an nginx reverse proxy and assign a local DNS.
Before we begin, head over to Tailscale and create an account if you don’t already have one. After logging in, you’ll need to update your access control policy.
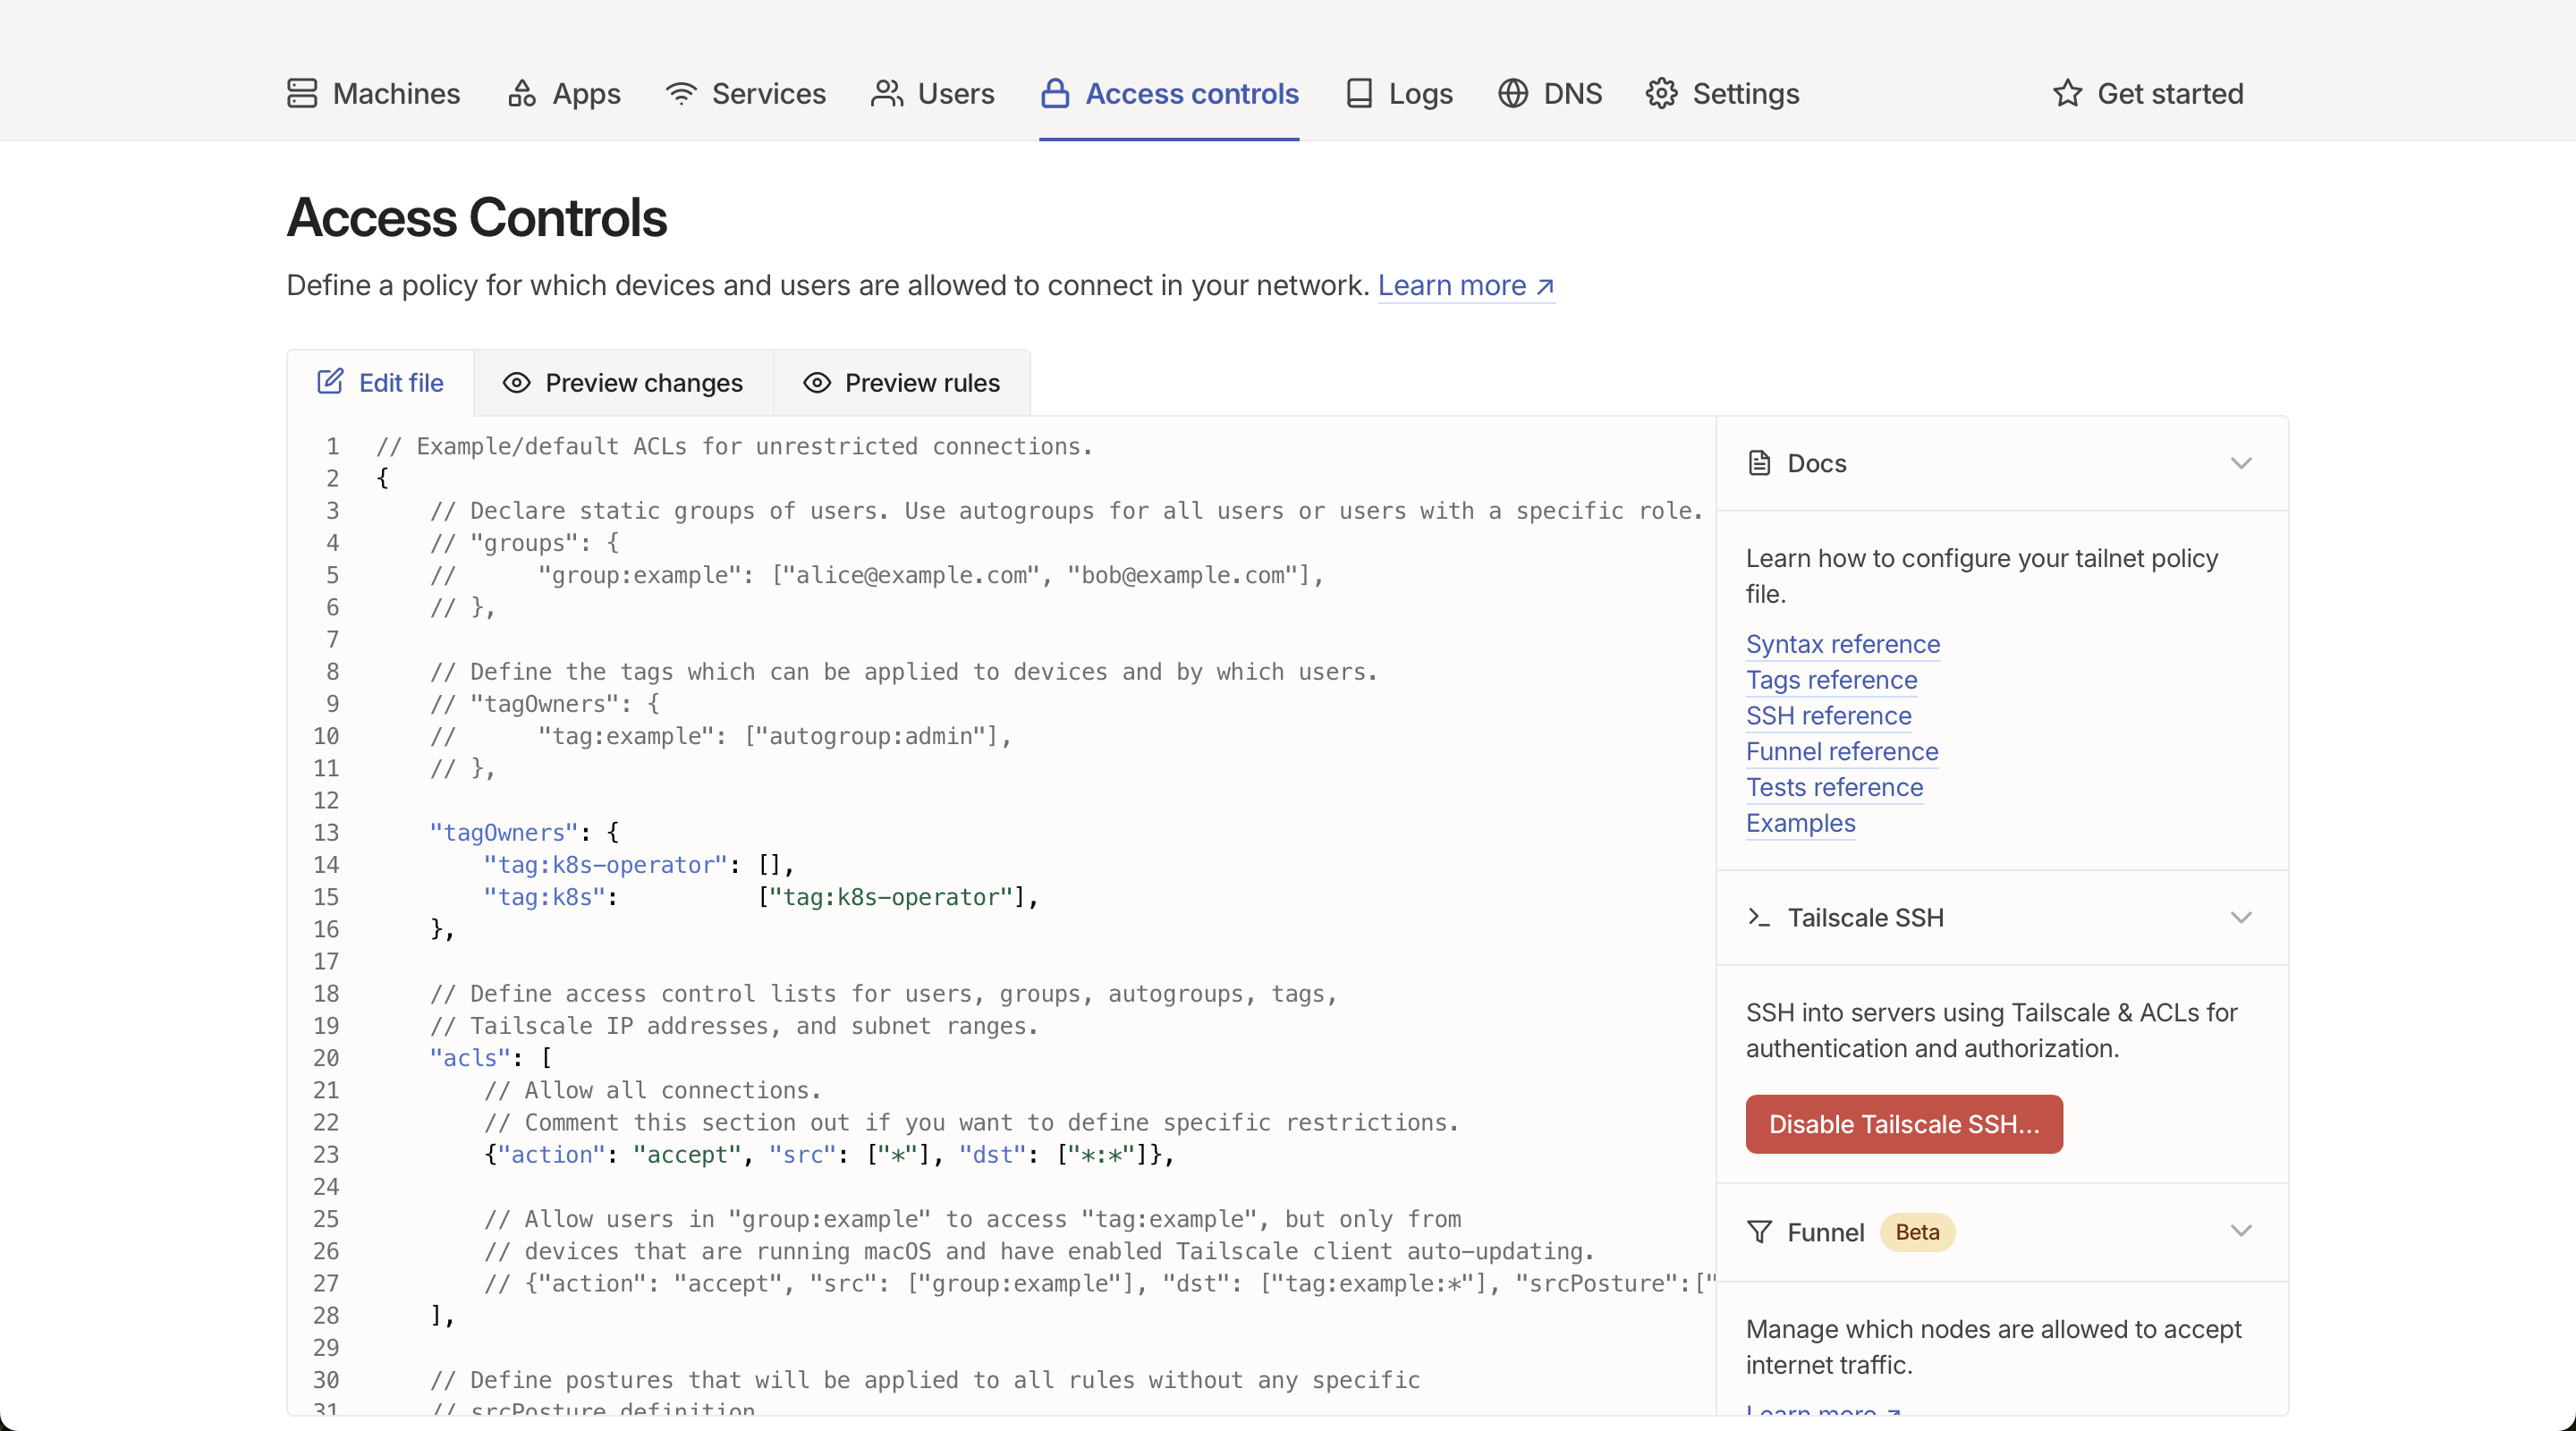
In the Access Control section, add the following under tagOwners:
"tagOwners": {
    "tag:k8s-operator": [],
    "tag:k8s": ["tag:k8s-operator"]
}
Next, update the nodeAttr at the bottom to include the "tag:k8s" tag like this:
"nodeAttrs": [
    {
        "target": ["autogroup:member", "tag:k8s"],
        "attr": ["funnel"]
    }
]
Now, you’ll need to create OAuth credentials from your Tailscale settings. These will be used when setting up the Tailscale operator in Kubernetes.
We’re going to use the Tailscale Ingress Controller or Kubernetes Operator to handle this. You can find more details on the official page here. We’ll install the operator using Helm, a Kubernetes package manager.
First, install Helm by running the following commands:
curl -fsSL -o get_helm.sh https://raw.githubusercontent.com/helm/helm/main/scripts/get-helm-3
chmod 700 get_helm.sh
./get_helm.sh
Now, we’ll install the latest Kubernetes Tailscale operator in the tailscale namespace. Here’s how:
-
Add Tailscale's Helm chart repository:
helm repo add tailscale https://pkgs.tailscale.com/helmcharts -
Update your local Helm cache:
helm repo update -
Install the Tailscale operator, passing in the OAuth credentials you created earlier:
helm upgrade \
  --install \
  tailscale-operator \
  tailscale/tailscale-operator \
  --namespace=tailscale \
  --create-namespace \
  --set-string oauth.clientId=<OAuth client ID> \
  --set-string oauth.clientSecret=<OAuth client secret> \
  --wait
Now that we have the Tailscale operator set up, let’s create an Ingress that will allow your application to be accessed publicly over the internet. We’ll use the following YAML configuration as an example to expose our nginx service:
apiVersion: networking.k8s.io/v1
kind: Ingress
metadata:
  name: nginx
  annotations:
    tailscale.com/funnel: 'true'
spec:
  defaultBackend:
    service:
      name: nginx
      port:
        number: 80
  ingressClassName: tailscale
  tls:
    - hosts:
        - nginx
This YAML file defines an Ingress that uses the Tailscale operator to funnel traffic through Tailscale’s network. The tls section ensures that the traffic is encrypted.
To create the Ingress, use the following command:
kubectl create -f ingress.yaml
If everything is set up correctly, this command will create the Ingress, and you’ll be able to retrieve an address associated with it. You can check the status using:
$ kubectl get ingress
NAME    CLASS       HOSTS   ADDRESS                   PORTS     AGE
nginx   tailscale   *       nginx.tail34bdc6.ts.net   80, 443   2m
Once you have the address, you can run curl on the address to access your application:
curl <your-ingress-address>
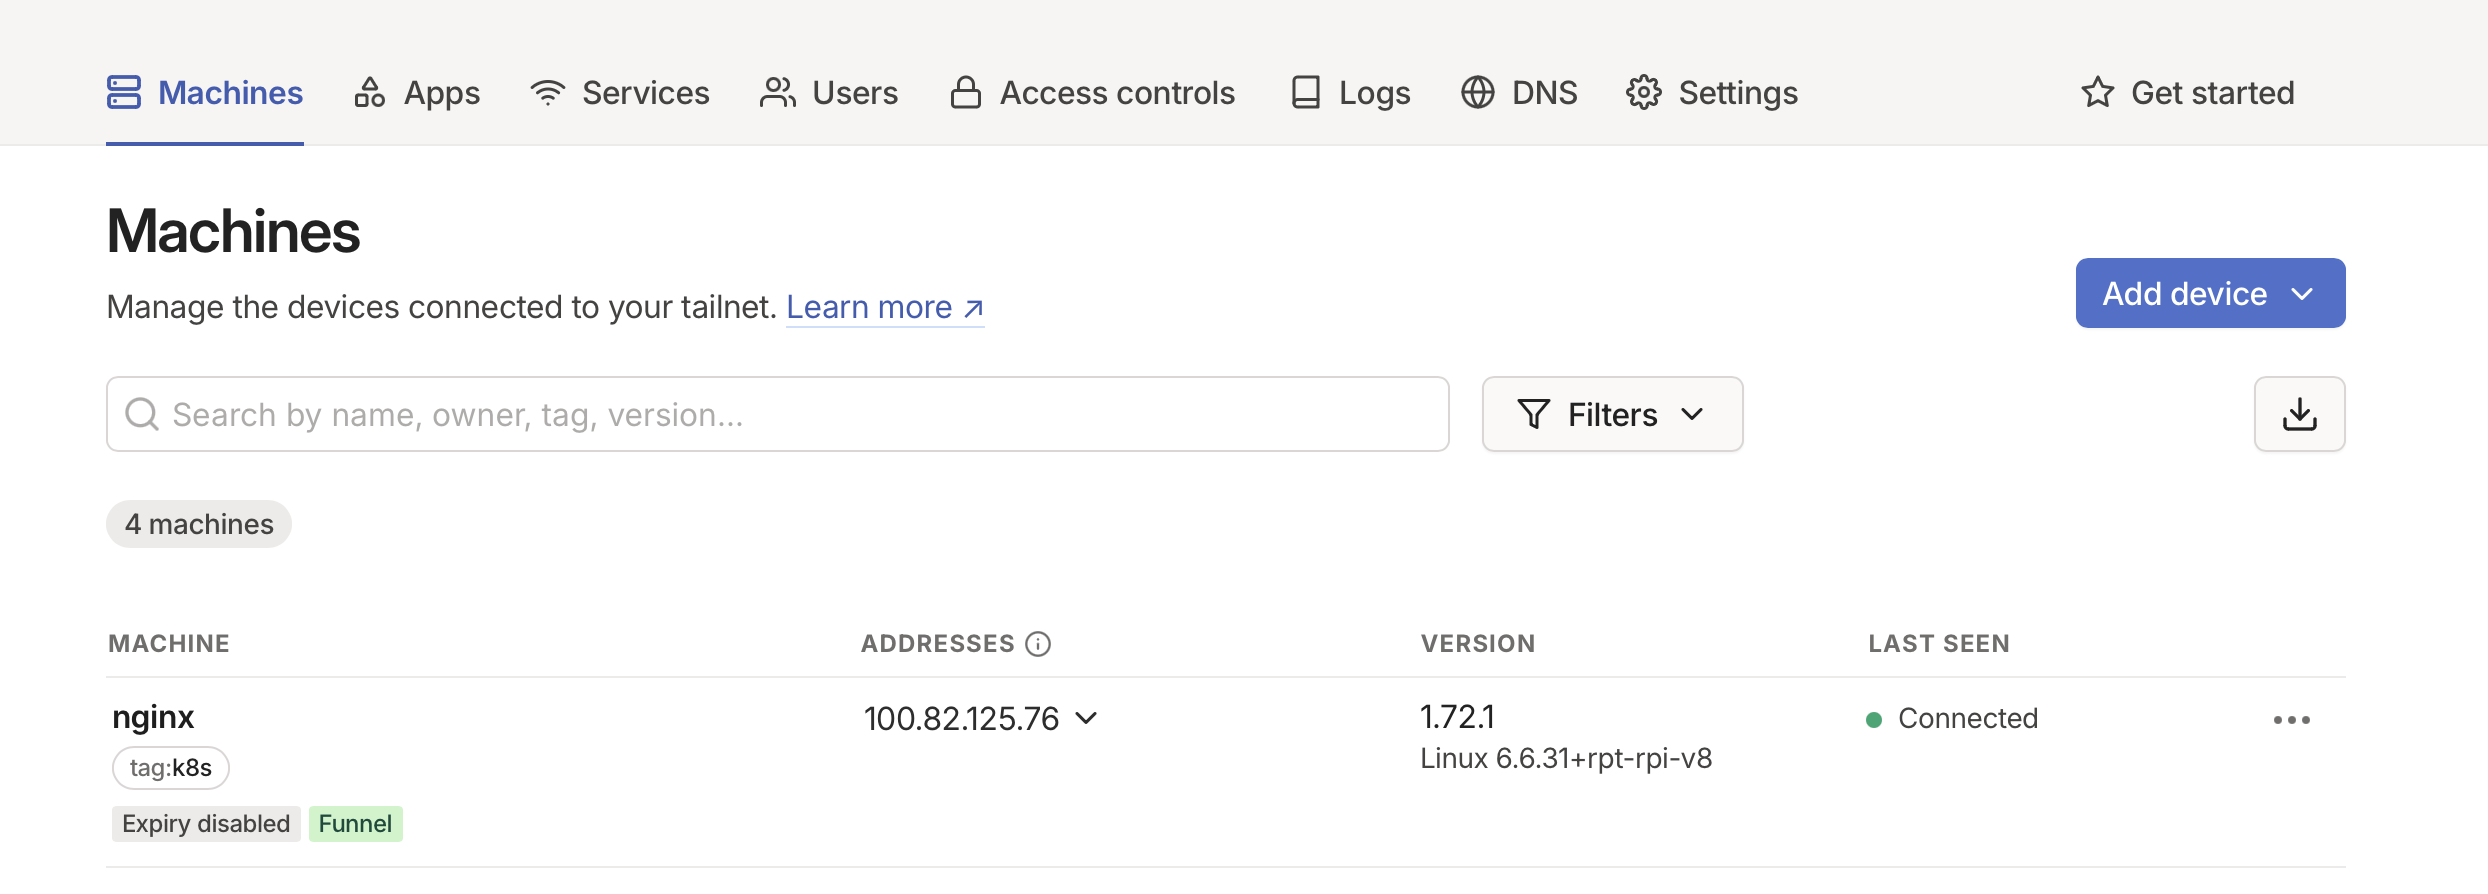
Congratulations! You’ve successfully deployed your application publicly using your own Raspberry Pi and Kubernetes. You'll find nginx under machine on your Tailscale dashboard.
One important thing to note is that you can’t use custom DNS with Tailscale Funnel directly. However, there is a workaround—using a proxy like Traefik. By setting up Traefik to expose your applications on your host’s ports 80 and 443, you can then use Tailscale to expose them to the internet. This approach will allow you to use custom domains with your self-hosted applications.
I’ll be covering this setup in detail in a future guide, so stay tuned! If you have any questions or need help, feel free to reach out.